What should I do if my car's headlights appear dim or foggy?

Headlights are an essential safety feature of your car, ensuring visibility during nighttime driving or poor weather conditions.
However, over time, headlights can become dim or foggy, significantly reducing their effectiveness and potentially compromising your safety on the road. This article provides a comprehensive guide on why headlights become dim or foggy and what you can do to restore their brightness.
Understanding the Causes of Dim or Foggy Headlights
Before diving into solutions, it’s important to understand why headlights may become dim or foggy. Several factors contribute to this common issue:
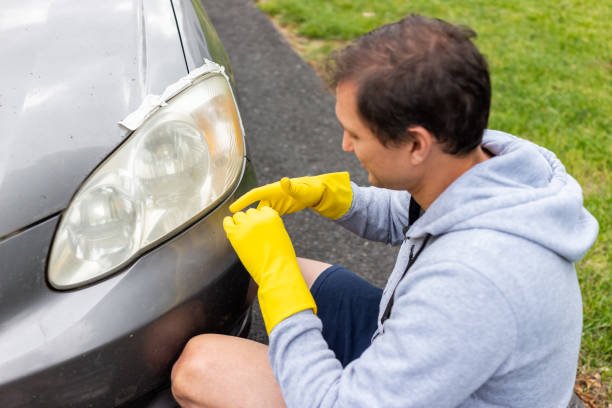
- Oxidation of the Headlight Lens: Modern headlights are typically made of polycarbonate plastic, which is durable but prone to oxidation. UV rays from the sun can cause the outer layer of the lens to degrade, leading to a cloudy, yellowish appearance.
- Accumulation of Dirt and Grime: Over time, dirt, dust, and road debris can accumulate on the surface of the headlights, creating a layer that blocks light from passing through effectively.
- Moisture Inside the Headlight Assembly: Condensation can form inside the headlight assembly due to temperature changes or a compromised seal. This moisture can cause fogging and reduce the brightness of the headlights.
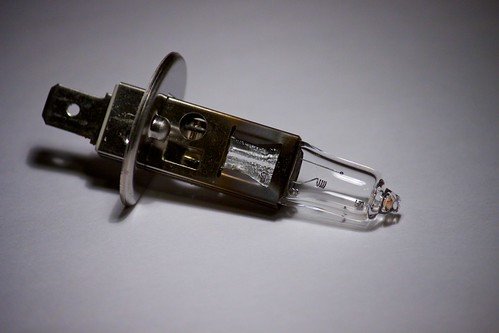
- Burned-Out or Worn-Out Bulbs: Headlight bulbs have a limited lifespan. As they age, their light output diminishes, causing the headlights to appear dim.
- Electrical Issues: Problems with the car’s electrical system, such as a failing alternator or corroded wiring, can affect the power supply to the headlights, resulting in dim lighting.
- Discoloration of the Reflector Bowl: The reflector bowl inside the headlight assembly can discolor over time due to heat and age, reducing the headlight’s ability to project light effectively.
How to Diagnose the Problem
Identifying the root cause of dim or foggy headlights is the first step in addressing the issue. Here are some diagnostic steps you can take:
- Inspect the Headlight Lens: Look at the headlight lens for signs of oxidation, dirt, or scratches. A yellowish or cloudy appearance indicates oxidation, while visible dirt and grime suggest the need for cleaning.
- Check for Moisture: If you see condensation inside the headlight assembly, it’s likely that moisture has entered due to a compromised seal. This is a common cause of foggy headlights.
- Test the Bulbs: Turn on your headlights and observe their brightness. If one or both headlights appear dim, it may be time to replace the bulbs. Compare the brightness to a new or known-good headlight bulb if possible.
- Inspect the Electrical System: Check for any signs of corrosion or damage to the wiring and connections. Ensure that the alternator is functioning correctly and providing adequate power to the headlights.
Solutions for Dim or Foggy Headlights
Once you’ve identified the cause of the dim or foggy headlights, you can take appropriate action to restore their brightness. Here are some effective solutions:
Cleaning and Restoring the Headlight Lens
If your headlights are suffering from oxidation or dirt accumulation, cleaning and restoring the lens can significantly improve their clarity and brightness. Here’s how you can do it:
Materials Needed:
- Headlight restoration kit (available at auto parts stores)
- Microfiber cloths
- Masking tape
- Water and soap
- Sandpaper (various grits if not included in the kit)
- UV sealant (often included in restoration kits)
Steps:
- Clean the Headlights: Start by washing the headlights with soap and water to remove any surface dirt. Dry them with a microfiber cloth.
- Tape Around the Headlights: Use masking tape to protect the surrounding areas of your car’s paint from accidental scratches during the restoration process.
- Sand the Headlights: If using a restoration kit, follow the included instructions. Typically, you’ll start with a coarse grit sandpaper to remove the oxidized layer, then gradually move to finer grits to smooth the surface.
- Apply the Polishing Compound: Use the polishing compound included in the kit to buff the headlights to a clear finish. This step removes any remaining haze and restores clarity.
- Apply UV Sealant: To protect the headlights from future oxidation, apply a UV sealant. This step is crucial as it helps maintain the restored clarity for a longer period.
Replacing the Headlight Bulbs

If the bulbs are burned out or have significantly dimmed over time, replacing them is a straightforward solution. Here’s how you can do it:
Materials Needed:
- Replacement headlight bulbs (check your car’s manual for the correct type)
- Gloves (to avoid touching the bulbs with bare hands)
- Screwdriver (if necessary)
Steps:
- Access the Headlight Assembly: Depending on your car model, you may need to open the hood and locate the back of the headlight assembly. Some cars require the removal of other components to access the bulbs.
- Remove the Old Bulb: Disconnect the power connector from the bulb. If a retaining clip or ring is holding the bulb in place, carefully remove it. Pull out the old bulb.
- Install the New Bulb: Handle the new bulb with gloves to avoid getting oils from your skin on it, which can shorten its lifespan. Insert the new bulb into the socket, secure it with the retaining clip or ring, and reconnect the power connector.
- Test the Headlights: Turn on your headlights to ensure the new bulbs are working correctly.
Addressing Moisture Issues
If moisture is causing your headlights to fog up, you’ll need to remove the moisture and reseal the headlight assembly. Here’s what you can do:
Materials Needed:
- Silica gel packs
- Hairdryer
- Sealant or adhesive (appropriate for automotive use)
Steps:
- Remove Moisture: Open the headlight assembly (refer to your car’s manual if needed). Use a hairdryer to carefully evaporate any moisture inside. You can also place silica gel packs inside the assembly to absorb moisture.
- Reseal the Headlight Assembly: Inspect the seals around the headlight for any damage. Apply a new sealant or adhesive to ensure a tight seal and prevent future moisture ingress.
- Reassemble the Headlight: Put the headlight assembly back together and ensure it’s securely fastened.
Checking and Repairing the Electrical System
If electrical issues are causing your headlights to dim, you’ll need to inspect and repair the wiring and connections. Here’s a general approach:
Materials Needed:
- Multimeter
- Electrical tape
- Wire connectors
- Replacement wiring (if needed)
Steps:
- Inspect the Wiring: Look for any signs of corrosion, damage, or loose connections. Pay particular attention to the wiring near the headlight assembly and the battery.
- Test the Electrical System: Use a multimeter to check the voltage at various points in the circuit. Ensure that the alternator is providing adequate power and that there are no significant voltage drops.
- Repair or Replace Wiring: If you find any damaged or corroded wiring, replace it with new wiring and secure the connections with wire connectors and electrical tape.
Preventative Maintenance Tips
To keep your headlights in optimal condition and prevent future issues, follow these preventative maintenance tips:
- Regular Cleaning: Periodically clean your headlights with car shampoo and water to remove dirt and grime. Consider applying a protective film to guard against oxidation and UV damage.
- Use Headlight Restoration Products: Apply a headlight restoration product every few months to maintain clarity and prevent oxidation.
- Check for Moisture: Regularly inspect your headlights for signs of moisture. If you notice condensation, address the issue promptly to prevent damage.
- Replace Bulbs as Needed: Don’t wait for your headlight bulbs to burn out completely. If you notice a significant decrease in brightness, replace the bulbs to ensure optimal visibility.
- Inspect the Electrical System: Periodically check the wiring and connections for signs of wear or corrosion. Address any issues promptly to maintain a reliable power supply to your headlights.
When to Seek Professional Help
While many headlight issues can be resolved with DIY methods, there are times when seeking professional help is advisable:
- Complex Electrical Problems: If you’re unable to diagnose or repair electrical issues, a professional mechanic can identify and fix the problem efficiently.
- Severe Oxidation or Damage: If your headlights are severely oxidized or damaged, a professional headlight restoration service may provide better results than DIY methods.
- Persistent Moisture Issues: If you’re unable to eliminate moisture from your headlights, a professional can inspect and reseal the assembly to prevent future problems.
Dim or foggy headlights can significantly impact your visibility and safety on the road. By understanding the common causes of this issue and following the appropriate steps to address them, you can restore your headlights to their optimal condition.
Regular maintenance and prompt attention to any problems will ensure that your headlights remain bright and effective, helping you drive safely in all conditions.


